Showing posts with label i made this. Show all posts

Thursday, September 6, 2012

i made this - sharky

Photobucket


I COMPLETED MY FIRST QUILT!!! Okay, sorry for yelling. I didn't mean to be so loud. Meet Sharky. I don't remember where I'd seen it, but someone had a link to Quilts for Kids and since I was starting my quilting journey I thought this would be good practice, easy on my budget and for a good cause. 

I requested the kit from QFK probably 3 months ago and received it about 2 months ago. Included in the quilt were instructions and all the materials to create the top and back AND they were already precut. They couldn't have made it any easier. I just had to add the batting and binding.

Sharky came together super quick. I probably could've completed the entire thing in a single day if I'd kept on it. My only complaint would be that even though all the materials were precut, some of the of the pieces were not cut correctly, but it all worked out. Since QFK didn't provide binding or material to make binding,  the instructions suggested a manner in which to bind it with the overlap binding fabric, but it didn't make sense to me. Thankfully I had some extra material left over that coordinated nicely and whipped up some binding quick and easy. AND I figured out how to get the binding on there seamlessly. WOO!!! I'd tried binding on some pot holders and man oh man...ugly. So I'm glad this worked out for me perfectly.

QFK asks you send the instructions back with the quilt so they can recycle them, but I'd like to make a few more quilts with my scraps to send to them so I'm going to keep them for a bit and when I'm done I'll send them back in another package. If they'd send me another kit, that'd be pretty awesome too.

Swim, Bike, Quilt
Plum and June

Thursday, August 16, 2012

i made this - fat mouthed zipper pouch

Photobucket


After seeing the card holders I'd made my friend, Telissa, asked me if I could make her a zippered pouch that was large enough to carry a bunch lipgloss and still have enough space so she could root around inside to find the color she was looking for without having to pull any of them out. Her timing was just right. I'd just come across this tutorial for the fat mouthed zipper pouch and wanted to try it out.

It came together pretty quickly and turned out just as I expected. I could've lined up my seams a little better, but I wasn't really concerned about that. And I think it could use a thicker interfacing, but that has nothing to do with the tutorial because I just used what I had on hand. I liked this pouch enough that I almost didn't send it to Telissa. I really like this Lucy's Crab Shack fabric.

I wanted to give this tutorial another go with some quilting so I made a mini pouch to with some leftover Hello Kitty fabric that I had. I think the quilting turned out nicely. This was my first time quilting in this manner. The fabric is the same I used on a card holder for Telissa.

I put some extra HK goodies in the pouch and sent her the HK pouch too. I really enjoy putting together packages for people. She appreciated it.

I want to make myself one of these now even though I don't really know what I'd use it for. I've already got my fabric cut and ready to go. Just need to finish sewing up these card holders for Indie Gift Box first.


Saturday, July 28, 2012

i made this - card holder

Photobucket


I'm horrible about carrying business cards with me. Horrible! My wallet is a business card case, so I shouldn't have any excuses, but it's stuffed with my ID, debit card, bus pass and a few other things.

I found a cute tutorial to make this card holder earlier this week and thought, this looks pretty simple AND I really need to start carrying business cards with me, so why not. You can find the tutorial here. I ran across several other tutorials as well, they were all a little bit different. One of them had a button and elastic closure. It was cute, but I thought it might make it bulky.

They were pretty quick and easy to put together and I actually made two at once. It took me less than an hour to get them done. I cut into my Seaside fabric by October Afternoon. I've been wanting to cut into it since I got it. The inside is Hometown by Sweetwater. It matches perfectly I think. 


Looking at this photo right now I'm thinking I could modify the tutorial a little bit more to add a bit of an accent by binding it all the way around. We'll see.

Since I didn't need two card holders I offered up the blue one on Instagram and it was snatched up quickly. The recipient said she'd be using is as a bus pass holder. I think these would be awesome little mini wallets for just the necessities. Throw it in your pocket or bra, whatever and go. Especially if you're a runner, it'd be soft against your skin. 


The plan is to make a few more for Sew Loco and also submit them to Indie Gift Box to see if I can be picked up as a contributor for September or later this year.

Sunday, July 15, 2012

i made this - zipper pouch


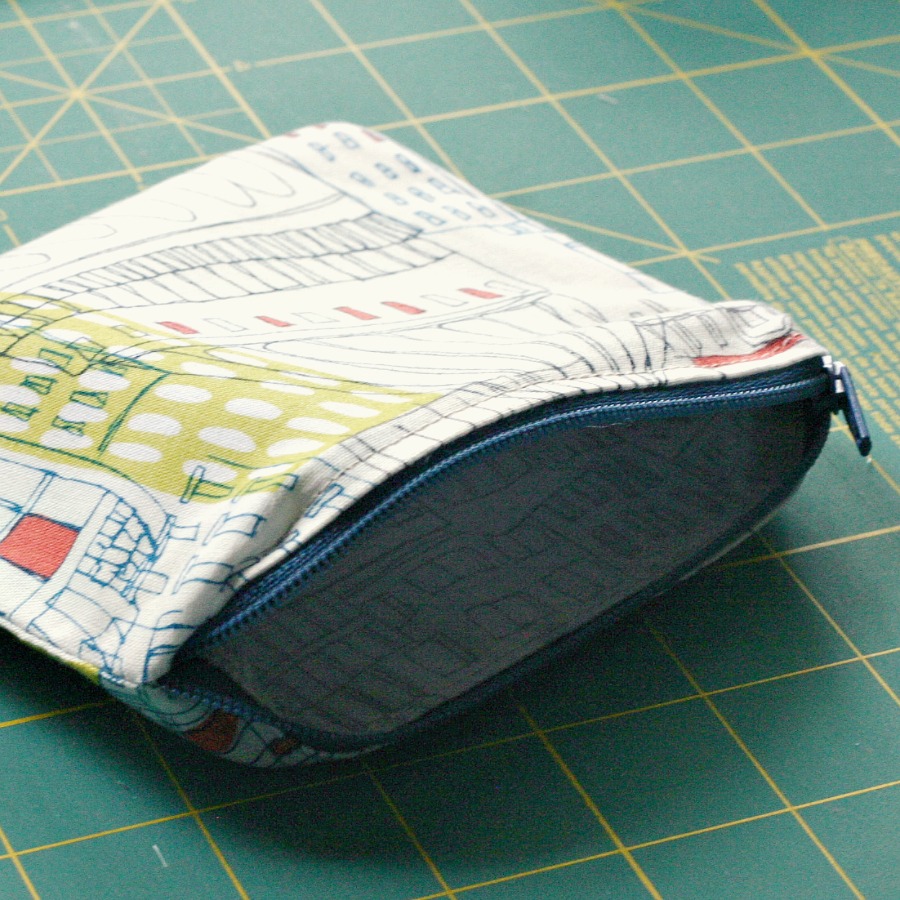
Either I can't read or zippers are just really hard. I suppose I could just admit that I can't read/follow pictures correctly. I found the pattern for this in 1, 2, 3 Sew by Ellen Luckett Baker. The only modification I made was by not adding the stamped twill tape. I'm sure I could've found a similar pattern online somewhere, but I had this handy book checked out from the library and right by my sewing machine, so why not?

I would say this was easy, but it wasn't because of my zipper issues. I'll try it again though. I had to rip the stitches several times because I couldn't get the zipper attached properly. But after I finally got the zipper attached it was pretty easy to finish up, so maybe I shouldn't say it wasn't easy. It was just a user error. I want to make more of these to give to friends. Maybe make some smaller ones for coin purses or something.  I guess I need to look for some good, but inexpensive zippers. Off to etsy I go.

I used City Scene in white for the outside and Rooftop in Grey for the inside. Both fabrics are part of Velocity by Jessica Hogarth. I love this fabric line.

Linking up with Plum & June's Let's Get Acquainted Monday Link Up.

Let's Get Acquainted

Wednesday, June 13, 2012

i made this! - pot holders

ignore the crooked stitches. which is exactly what you're going to look at now.
Here is my first go at quilting and free motion quilting. It took me a long time to decide what type of piecing I wanted to do for these guys. I even created a piece and then ended up scrapping it and starting over. I'm still not thrilled with them, but they're practice. I don't understand how others get such straight lines and even seams. It might be a patience thing. My binding looks a little bit better, but it still needs some work. Those corners are hard. I'm going to look into the curved corners and bias binding. The free motion quilting was fun. I still need to pick up a free motion/walking foot. Some of my stitches were long from moving to fast. Oops! When I get to work on my first quilt I'm definitely going to be taking my time.

These were fun and pretty easy to make. I used this pot holder tutorial from over at Oh, Fransson! It's a great and easy to follow tutorial. The only thing I changed was the line for the pocket piece, her line is curved and I went with straight. I'm not ready to tackle curves just yet. I'm not sure where the fabric is from, it was given to me by my friend Gale from over at Stamps and Stitches. It's been good practice fabric.

Sunday, June 3, 2012

i made this! - seat cushion


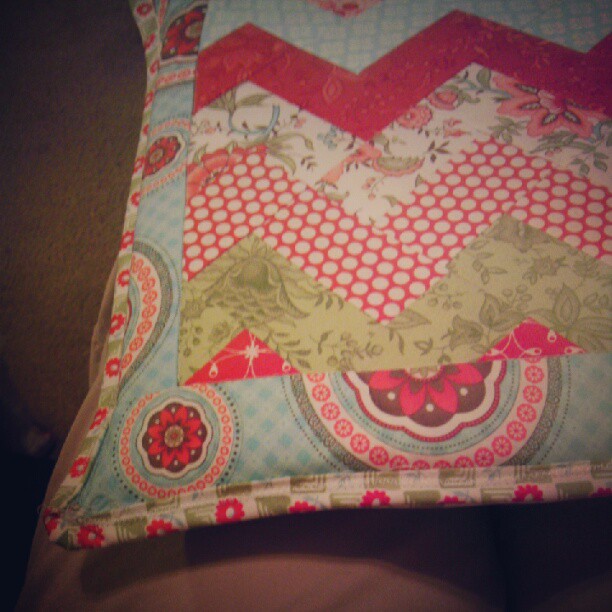
This is the seat cushion for my old wooden desk chair. It's my second sewing project and my first time piecing fabric together and doing binding. I rushed it and you might not really be able to tell by this photo but some of my seams don't line up and the binding is a mess. I didn't really care though seeing as it was just going to be a seat cushion and my butt was going to be all over it. Ha!

I used this tutorial to create the zig zag design. I made it in an envelope style. I suspect all the pillows I do will be in this manner as I have no desire to attempt hand sewing and I like the idea of switching them out once in a while without having a bunch of pillows all over the place. The fabric I believe is Moda - Bliss. It was given to me by my friend Gale over at Stamps and Stitches. It's the coordinating fabric to the quilt that she made me.

Saturday, May 26, 2012

i made this! - a pillow case


After years of not touching the sewing machine I own, that I bought when I wanted to try my hand at sewing, I touched it again. (that sounds a little dirty)

I don't even remember why I decided to take up sewing again a couple of weeks ago. I just know I got the bug and started looking at fabric and then started looking at blogs and then watched a few hours of YouTube tutorials and now I'm a little obsessed. (I'll post the YouTube and blog tutorial I followed below)

So this is the first thing I've made after watching all those tutorials and looking at all those blogs. It's called a sausage or tube pillow case and I even tried French seams. It turned out pretty nice I think, especially for a first try. I believe it is called a sausage/tube pillow case because of how it is put together. You line up all your raw edges, roll up the case and sew it all up like a sausage and then you flip it right side out. All your edges end up encased.

Here is the YouTube tutorial I watched: Easy Tube Pillow Case Tutorial by Missouri Quilt Co. And here is a blog tutorial using the same method and then doing French seams: Pillow cases w/ French Seams by Notes from Patches (scroll about half way down to see the French seams portion). The only difference with mine is that I cut my accent band fabric 1.5" wide, because I didn't want that much of an accent band. The fabric I used is VeloCity by Jessica Hogarth (for both the cuff and the main fabric, the white is Kona I believe). I bought it at one of my local fabric shops: Crimson Tate (cute little shop, I love it and I like to support local businesses when I can).